Posts

UE4 Asset Directory Listing Blueprint

Image
So I needed to be able to, in game, get listing of asset directories and assets in a folder style.  The purpose is to let me make on-the-fly menu selections of something like 10000 assets in game and do it fast. Turns out in UE4.25 you can do all of this in blueprints. The low level problem is that assets get packaged into .pak files when you ship the game.  Regular C++ style file and directory operations will not find any assets.  Instead there is the Asset Manager. Assets are bundled as assets and are not in a directory structure in the pak file.  The path to an asset is in effect just a string.  So the over all flow is... Load all the assets under one or more asset directories.  When the game is packaged what was something like Content/DefaultObjects/Trees becomes /Game/DefaultObjects/Trees. When you want to ask "What sub directories and assets are in /Game/DefaultObject/Trees you call my blueprint node.  It returns a result structure with a list of string for subdir

TWIT Multi Thread Works!!!!!

Ok, I got multi threading into TWIT C.  It can have any power of 2 number of threads in the set of 1,2,4,8,16,32,64,128,256. On my machine at 8 threads it is 0.49 milliseconds per twit on my benchmark. The core is now done and unit tests pass. On to Cognate, SRS, and NuTank.....

TWIT in C Works

Image
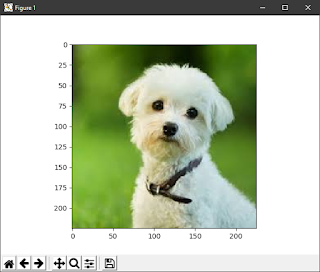
Status update.... TWIT now has a .c file that can be called from Python to do the core iteration of TWIT. Performance The performance is now at 2 ms. per TWIT of 255x255x3 to 100 x 200 x 3 with preclear of destionation to 0.0, of the dog1.jpg image. I tested it with a loop of 10,000 iterations with a cached twit definition. Generating the twit parameters is very fast too. Before in pure python it was many seconds for one transfer.                                       Original, and TWIT stretched and Weight Fade. The code in Python Available on GitHub at  https://github.com/RMKeene/twit Next step..... Multithread! import   numpy   as   np import   twit import   twitc from   PIL   import   Image import   matplotlib . pyplot   as   plt def   scale_image () :      """     Test code and example to scale an image using Twit.     """      im   =   Image . open ( "dog1.jpg" )      plt . imshow ( im ,  cmap

Identifying the "I" Illusion

Just discovered a technique for uncovering the unreality of the self. I was reading Gateless Gatecrashers by Iiona Ciunaite and Elena Nezhinsky. Where is "I" located?  Well, just there between the eyes and a bit behind the eyes.  When I focus on just being there, eyes open, "I" is right there.  One has a strong sense of self and location. So shift focus to the ears.  What do you hear? Where is the sound located? Focus on the sounds you are hearing.  Now look at where "I" is.  IT MOVED. Now "I" is between the ears, in the center of your head. Lets extend this, focus on your two hands.  Imagine throwing a magic fireball like some wizard.  May do some two hand Karate moves.  Where is "I" now?  IT MOVED. "I" is now between and a little behind your hands. Now get good at seeing this point of view shift. Ready?  One , two, three... When you look at the thing doing the viewing, the "I", who is doing the looking? W

Twit Progress

Phew, a lot of work. I am making the TWIT algorithms as a PyPI package that only deals with Tensor Weighted Interpolative Transfer.  It has nothing of Cognate nor SRS nor NuTank in it. It will let one do all sorts of scaling and clipping between tensors.  Often people ask on StackOverflow about scaling images in tensors, and the current solution is to use an the pillow image library.  You convert from tensor to image, scale, and back to tensor. Twit will let one do that without the image library, and crop and clip.  Anyway, lots of progress. It will be up soon as a GitHub project.

Tensor Weighted Interpolative Transfer in Python

I decided to switch the entire Cognate and NuTank project to python. I am first switching the TWIT algorithms over.  It is amazing how terse the code becomes!

Tensor Weighted Interpolated Transfer (TWIT)

Image
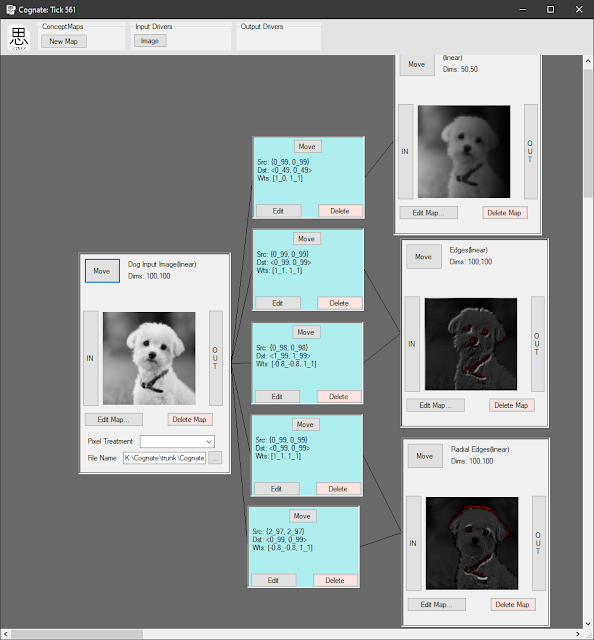
One function that is at the core of the SRS system is where the activation of a N-Dimensional map of neurons (a Tensor) should stimulate some part or all of another tensors activation.  This has several parameters. Source and Target dimensions.  In NumPy nomenclature this is the shape and slices of the source and target tensors. For example the source tensor A might be (4,5,6) in shape and the target B might be (7,8) in shape.  They miss match on both count of dimensions and size of dimensions. Also along each axis of the larger dimension tensor (in this case A) there is a start and end weight usually between -1.0 and 1.0.  We want to interpolate the weights along that dimension. One may also select a subset of either or both A and B as the connected part.  The form of this is source, destination, and weight ranges for each dimension.  If some part is missing it is assumed to be the whole range of the tensor dimension, or for weights is assumed to be 1.0.  Here is a screen shot